
Modifying your car doesn’t have to be a gamble against your insurance company; it’s a matter of strategic risk management.
- Treat every modification as a documented investment, not just a purchase, by keeping all receipts and certifications.
- Communicate proactively with your insurer before installation, armed with proof of quality like TÜV certificates.
Recommendation: Start a “Build Binder” today. This single step of organizing all your part documentation is the foundation for protecting your car’s value and your insurance coverage.
The desire to personalize a vehicle is a core part of car culture. It starts with a vision: a lower stance, a more assertive exhaust note, a unique color that turns heads. But for every enthusiast dreaming of their perfect build, a shadow of anxiety looms. The horror stories are modern folklore in the community: a denied claim after an accident, a policy canceled without warning, or failing a crucial state inspection. This fear often leads to a paralyzing dilemma between expressing one’s automotive passion and maintaining financial and legal security.
The common advice—”just tell your insurer”—is dangerously simplistic. It ignores the fundamental disconnect between how enthusiasts see their upgrades and how insurers calculate risk. They aren’t interested in your improved 0-60 time; they’re interested in quantifiable changes to the vehicle’s value, safety profile, and repairability. The key isn’t simply to inform, but to control the narrative. It requires a shift in mindset from a hopeful enthusiast to a knowledgeable vehicle manager.
This guide moves beyond platitudes to offer a strategic framework. We will dismantle the idea that modification is inherently a risk and reframe it as a manageable investment. The true secret to modifying a car for street use without jeopardizing your insurance is not found in loopholes, but in meticulous documentation, an understanding of certification standards, and proactive, educated communication. By learning to speak the language of risk and value, you can build the car you want while ensuring it remains fully protected.
This article provides a comprehensive roadmap for navigating the complex intersection of car modification and insurance. It breaks down the psychology behind our choices, the practical steps for documentation, and the technical knowledge required to make informed decisions. Follow along to build with confidence.
Summary: How to Modify Your Car for Street Use Without Voiding Your Insurance?
- Why Do We Feel the Need to Modify Stock Vehicles?
- How to Declare Modifications to Your Insurer Without Getting Dropped?
- Wrap vs Paint: Which Modification Holds Better Resale Value?
- The Ebay Parts Risk That Can Cause Catastrophic Suspension Failure
- How to Plan Your First 3 Mods for Maximum Impact Under $1,000?
- TUV vs DOT: Which Certification Actually Matters for Your Country?
- Why Do We Fear the “Wrong Choice” More Than No Choice at All?
- How to Pass Vehicle Inspection With Modified Suspension and Exhaust?
Why Do We Feel the Need to Modify Stock Vehicles?
The impulse to modify a car runs deeper than a simple desire for more horsepower or a different look. It’s fundamentally about identity and connection. A stock vehicle is an anonymous appliance, but a modified one becomes a personal statement. This transformation is driven by powerful psychological forces that turn an assembly-line product into a unique extension of its owner. Understanding these drivers is the first step in making conscious, defensible choices about your build.
Three core concepts explain this powerful urge to customize:
- The IKEA Effect: This cognitive bias describes how we place a disproportionately high value on things we partially create ourselves. Just as assembling a simple bookshelf makes it “yours,” installing a new set of wheels or an intake system creates a powerful sense of ownership and personal investment in the vehicle.
- Use Case Definition: Modifications are a way of tailoring a generalist tool for a specialist purpose. A stock sedan is designed for everyone, but by adding stiffer suspension and better brakes, you are defining its use case as a “canyon carver.” This act of specialization for performance, comfort, or aesthetics reinforces your identity as a specific type of driver.
- The Automotive Tribe: Humans are social creatures, and car communities are our tribes. Modifying a car to fit a certain style—JDM, Euro, Muscle—is a way of signaling allegiance to a group. It’s a visual language that communicates shared values, knowledge, and passion, creating a sense of belonging.
These psychological drivers are not frivolous; they are the foundation of your “why.” When you can articulate that your modifications are not random acts but a deliberate process of personalization and specialization, you begin to build the narrative of a responsible owner, which is a critical first step before ever speaking to an insurer.
How to Declare Modifications to Your Insurer Without Getting Dropped?
The most dreaded conversation in the enthusiast world is the one with the insurance agent. The fear of skyrocketing premiums or an outright policy cancellation causes many to hide their upgrades, a decision that can lead to financial ruin if a claim is denied. The solution is not silence, but a strategy of proactive and documented disclosure. You must approach your insurer not as a guilty party confessing a sin, but as a responsible asset manager detailing an increase in value.
According to licensed insurance agent Stuart, featured in The Autopian’s guide to modified car coverage, the key is to work *with* your agent. He advises getting quotes for planned upgrades ahead of time to budget for any rate changes and to ensure your policy covers the new “stated value” rather than the “actual cash value” of the unmodified car. This transforms the conversation from a reactive problem into a proactive planning session. The foundation of this approach is impeccable documentation, which proves the quality and value of your investments.
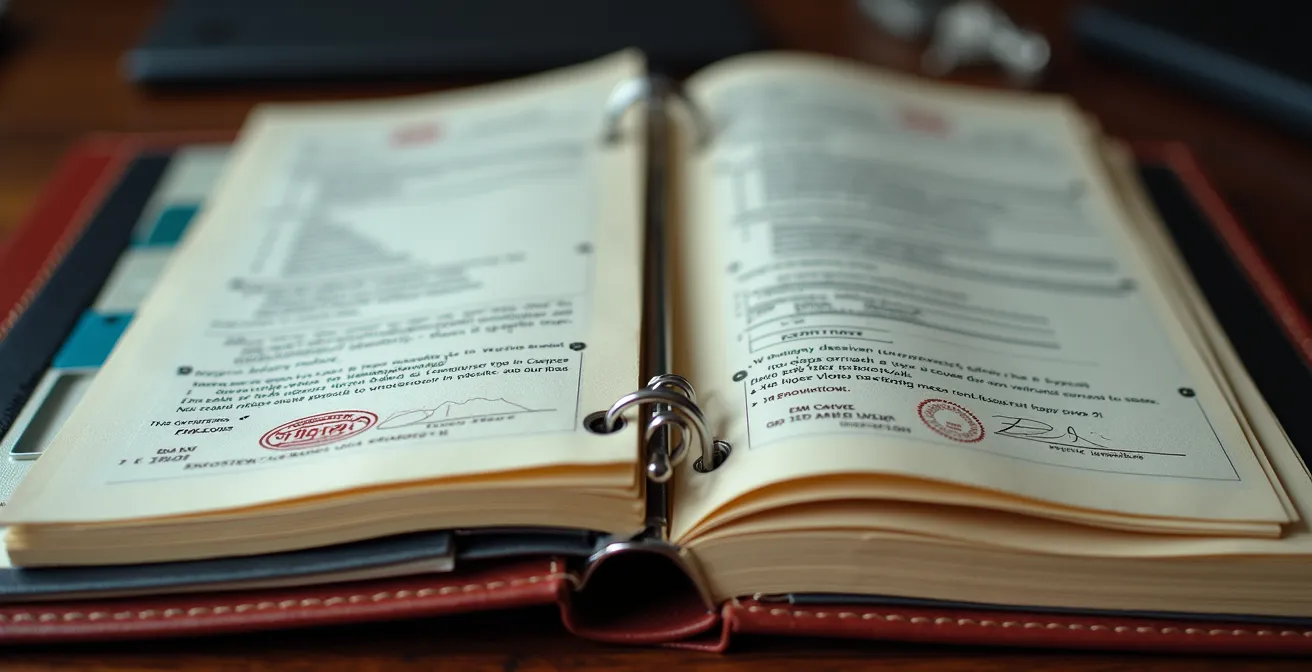
Your primary tool in this process is a “Build Binder.” This meticulously organized collection of documents is your evidence. It demonstrates that your modifications are professional, value-adding improvements, not reckless changes. It serves as your single source of truth when discussing your vehicle’s value with an insurer or appraiser.
Your Action Plan: The Build Binder Documentation Strategy
- Create a physical or digital folder with all receipts, part numbers, and professional installation invoices for every modification.
- Include all certifications for aftermarket parts, such as DOT compliance letters or, ideally, TÜV certificates.
- Document the value of your modifications with high-quality photos before and after installation, and consider a professional appraisal certificate for high-value builds.
- When speaking to your insurer, frame modifications in terms of safety and reliability—e.g., “upgraded brakes for improved stopping distance” or “certified wheels that exceed OEM strength ratings.”
- If your total modification value exceeds $5,000, consider switching from standard insurers to a specialist provider like Hagerty or Grundy, who are equipped to handle custom vehicle policies.
Wrap vs Paint: Which Modification Holds Better Resale Value?
Changing a car’s color is one of the most dramatic modifications one can make, but the method chosen has profound implications for its future value. The traditional path of a full respray and the modern alternative of a vinyl wrap present a clear trade-off between permanence and preservation. From a purely financial and insurance perspective, the choice is surprisingly clear: a high-quality wrap is almost always the superior choice for maintaining or even enhancing resale value.
A custom paint job, no matter how well-executed, is a permanent and highly subjective change. A future buyer might not share your taste for a specific color, immediately limiting your market and potentially lowering the car’s value. More importantly, it erases the original factory paint, which is often a key factor for collectors and discerning buyers seeking an unmodified example. A wrap, on the other hand, acts as a protective and reversible shield for the factory finish. This preserves the original value of the car beneath it. The growing acceptance of this technology is clear, as industry analysis shows a 22.2% CAGR growth in the automotive wrap films market.
The following table breaks down the key differences, highlighting why a wrap is a more strategic investment for most street cars.
| Factor | Vinyl Wrap | Paint Job |
|---|---|---|
| Initial Cost | $1,800-$5,000 | $5,000-$10,000+ |
| Installation Time | 1-3 days | 1-2 weeks |
| Lifespan | 5-7 years | 10-20 years |
| Reversibility | Fully reversible | Permanent |
| Original Paint Protection | Yes – preserves factory finish | No – replaces original |
| Resale Impact | Positive – maintains original value | Variable – depends on buyer taste |
| Customization Options | Unlimited designs/textures | Limited to paint colors |
Ultimately, a wrap allows you to enjoy complete aesthetic personalization without making an irreversible financial commitment. When it’s time to sell, you can either find a buyer who loves the wrap or simply remove it to reveal the pristine, factory-original paint underneath, maximizing your potential buyer pool and protecting your investment.
The Ebay Parts Risk That Can Cause Catastrophic Suspension Failure
In the world of car modifications, the allure of a bargain is a powerful siren song. Marketplaces like eBay and Amazon are filled with parts that look identical to their high-end counterparts at a fraction of the price. However, for safety-critical components like suspension, wheels, and brakes, this “deal” can create a massive liability chasm—the dangerous gap between a part’s appearance and its unproven, uncertified, and ultimately uninsurable reality. Installing a counterfeit or poorly manufactured suspension component isn’t just a risk to your car; it’s a risk to your life and your financial future.
When a certified part from a reputable manufacturer fails, there is a clear chain of liability. But when a no-name part fails and causes an accident, your insurance company will investigate. If they discover the failure was due to a substandard, non-certified component, they have strong grounds to deny your claim entirely, leaving you personally responsible for all damages and potential lawsuits. As experts in tort law point out, significant modifications like hydraulic suspension changes can either cause insurance costs to skyrocket or void coverage altogether.
To navigate this minefield, you must adopt a strict sourcing hierarchy, what can be called the “Pyramid of Trust.”
- Level 1 (Highest Trust): Manufacturer Direct/Authorized Dealers. This is the only source for guaranteed authentic parts. Always verify a dealer’s authorization.
- Level 2: Reputable Performance Shops. Look for shops with ASE-certified technicians and proper business insurance. They have a reputation to protect.
- Level 3: Well-Reviewed Marketplace Sellers. This is a riskier tier. Only consider sellers with near-perfect ratings (98%+) over a long history and hundreds of reviews.
- Level 4 (Avoid): Unvetted Private Sellers & “Too Good to Be True” Deals. Never purchase safety-critical components from unknown individuals or anonymous online storefronts. The risk of receiving a counterfeit or damaged part is simply too high.
Every part you buy should be documented in your Build Binder. The invoice is not just a proof of purchase; it’s a link in the chain of liability that protects you. Skimping on the cost of a crucial part is a gamble where the potential loss far outweighs the initial savings.
How to Plan Your First 3 Mods for Maximum Impact Under $1,000?
Jumping into car modification can be overwhelming, with a seemingly infinite catalog of parts. For a new enthusiast, the most effective approach is to focus on changes that deliver the most tangible improvements in driver experience and safety. With a budget of under $1,000, you can make significant, strategic upgrades that are also easily defensible to an insurer. The key is to prioritize connection to the road and control over the vehicle.
The “Grip, Stop, Feel” framework is a time-tested strategy for a first round of modifications. It focuses on foundational elements that enhance safety and engagement, making them easy to justify.
- Grip ($400-$600): High-Performance Tires. This is the single most impactful modification you can make. Tires are the only part of your car that touches the road. A quality set of summer or all-season performance tires dramatically improves acceleration, braking, and cornering in all conditions. When declaring to your insurer, frame this as “improved wet-weather safety equipment.”
- Stop ($200-$300): Upgraded Brake Pads and Fluid. The ability to stop is more important than the ability to go fast. High-quality brake pads and swapping to a higher-temperature DOT 4 fluid can significantly reduce stopping distances and prevent brake fade during spirited driving. Present this as “enhanced stopping distance for emergency safety.”
- Feel ($100-$200): Improved Driver Controls. This could be a short-throw shifter for a more precise gear change or a quality steering wheel (on older cars without airbags). These changes heighten your physical connection to the car’s mechanics. Describe these as “improved vehicle control components.”
This entire suite of foundational upgrades can often be done for under $1,000. Crucially, this budget often falls within a gray area for insurers. For example, a policy from Direct Auto may automatically include up to $1,000 in coverage for custom parts and equipment. By focusing on safety-oriented mods and staying within this initial budget, you can begin your modification journey on solid ground, building both a better car and a history of responsible ownership.
TUV vs DOT: Which Certification Actually Matters for Your Country?
In the world of aftermarket parts, not all certifications are created equal. You will frequently see two acronyms: DOT and TÜV. While both relate to compliance, they represent fundamentally different philosophies of safety and quality. Understanding this difference is critical for a risk-managing enthusiast, as one is a minimum legal requirement, while the other is a powerful tool for proving quality to your insurer.
DOT (Department of Transportation) is the standard for parts sold in the United States. However, it’s crucial to understand that DOT is a self-certification system. A manufacturer simply states that their product meets DOT standards. There is no mandatory third-party testing or verification before the part is sold. While there are penalties for non-compliance if caught, the initial burden of proof is on the manufacturer, not an independent lab.
TÜV (Technischer Überwachungsverein), on the other hand, is a German-based third-party testing and certification organization. For a part to receive TÜV approval, it must undergo rigorous testing to prove it is at least as safe and durable as the original OEM part it replaces. This is an expensive, intensive process that verifies material quality, performance under stress, and manufacturing consistency. It is the gold standard for aftermarket part quality worldwide.
A TÜV certificate on an aftermarket part is a powerful document that proves the part meets a standard higher than legally required, demonstrating you are a responsible owner.
– Insurance Industry Analysis, U.S. News Insurance Guide
So, which matters for your country? Legally, you must have DOT-compliant parts in the U.S. However, for your insurance and your peace of mind, a TÜV certificate is an invaluable document. It is irrefutable proof that you have chosen a high-quality, rigorously tested component. In a post-accident investigation, showing your insurer a TÜV certificate for your aftermarket wheels or suspension is a definitive statement of responsible, safety-conscious ownership.
Why Do We Fear the “Wrong Choice” More Than No Choice at All?
The world of car modification is a universe of infinite choice. For every component, there are dozens of brands, materials, and price points. This abundance, which should be empowering, often leads to a state of “analysis paralysis.” Many enthusiasts spend months or even years researching, agonizing over decisions, and ultimately doing nothing. This fear of making the “wrong choice” can be more debilitating than making no choice at all, leaving a car frustratingly stock and a dream unfulfilled.
This psychological hurdle stems from the perceived finality of the decision. We see modifications as irreversible and costly mistakes. This anxiety is the “Gambler’s Mindset”—taking a chance on an unknown part or an unvetted shop and hoping for the best. The antidote to this fear is adopting the “Investor’s Mindset.” An investor doesn’t gamble; they perform due diligence. They research, verify, and understand the asset before committing capital. In car terms, this means researching brands, demanding certifications like TÜV, and choosing reputable installers.
The feeling of being overwhelmed while surrounded by options is a common experience. The key to breaking this paralysis is to reframe the goal. Instead of seeking the “perfect” part, aim to find a “well-documented” part. A part with clear certification, a reputable manufacturer, and positive community reviews is a sound investment, even if a slightly “better” one might exist. This shifts the focus from an impossible quest for perfection to a manageable process of risk mitigation.
By creating your Build Binder and populating it with research and documentation *before* you buy, you transform anxiety into agency. Each purchase is no longer a leap of faith but a calculated, confident step in a well-planned project. You overcome the fear of the wrong choice by ensuring every choice you make is defensible, documented, and insured.
Key Takeaways
- Your “Build Binder”—a meticulous collection of receipts, invoices, and part certifications—is your single most powerful tool in any insurance discussion.
- Prioritize parts with TÜV certification over those that are only DOT-compliant. It is undeniable proof of quality and responsible ownership.
- Always communicate with your insurer proactively *before* installing modifications, framing them as safety and value enhancements.
How to Pass Vehicle Inspection With Modified Suspension and Exhaust?
For a street-driven modified car, the annual or biennial vehicle inspection is the ultimate test of compliance. This is where your build meets the objective, non-negotiable letter of the law. Failing an inspection for modified suspension or exhaust can be a frustrating and costly setback. However, passing consistently is not about luck; it’s about understanding the specific rules in your jurisdiction and having a concrete plan for compliance.
Inspectors are primarily concerned with safety and emissions. For suspension, they check for tire rub at full steering lock, proper headlight aim (which is affected by ride height), and secure installation. For exhausts, they check for illegal “test pipes” (catalytic converter deletes) and, in many states, measure decibel levels. It is your responsibility to know the specific regulations. For instance, state regulations like those in Indiana can specify strict limits, such as a maximum bumper height of 30 inches. A build that is legal in Texas might be illegal in California.
The most robust strategy for navigating inspection is planned reversibility. If you plan to install parts that sit in a legal gray area, such as adjustable coilovers or a cat-back exhaust, the smartest move is to keep your original OEM parts. A few hours of work once a year to swap back to the stock components is a small price to pay for a guaranteed pass and a year of worry-free driving. This requires preparation.
Your “Inspection Day Kit” should be part of your overall strategy:
- OEM Parts Storage: Keep your original catalytic converters, springs, and shocks clearly labeled and stored safely.
- Swap Toolkit: Have the right tools ready, including penetrating oil for rusty bolts, anti-seize compound for reassembly, proper jack stands, and a torque wrench.
- Stock Spec Documentation: Keep photos and measurements of your car at its stock ride height and with its original alignment specs. This helps you return it to a compliant state accurately.
- Pre-Inspection Checklist: Before going to the inspection station, run your own checks. Ensure no “Check Engine” lights are on and that all OBD-II readiness monitors are set. Check for tire rubbing and verify headlight aim.
By treating vehicle inspection not as an obstacle but as a planned event, you remove the stress and uncertainty from the process. It’s the final piece of the puzzle in being a responsible, knowledgeable, and fully legal modified car owner.
Start your Build Binder today. This is not just a suggestion; it is the first and most critical action you can take to begin modifying your car responsibly, protecting your investment, and driving with complete peace of mind.