In summary:
- Effective security relies on visible cameras as a primary deterrent, not hidden surveillance.
- Achieve data sovereignty by recording footage locally to an NVR or NAS, avoiding cloud-based subscription fees and privacy risks.
- Choose reliable, low-power sensor protocols like Zigbee or Z-Wave over WiFi for critical alarm triggers.
- Build a “digital moat” around your network by changing default passwords, segmenting devices, and disabling insecure router features.
The promise of smart home security often comes with a hidden cost: perpetual monthly subscription fees. Many homeowners feel trapped, paying for cloud storage and monitoring services they barely use, surrendering control of their own data in the process. The common solution is to simply buy “no-fee” cameras, but this approach only scratches the surface of true security autonomy.
This isn’t just about avoiding a bill; it’s about regaining control. A truly subscription-free system isn’t a collection of disparate gadgets, but a thoughtfully designed security ecosystem. To build one, you must think like an architect, not just a consumer. This means prioritizing physical deterrence, ensuring total data sovereignty with local storage, selecting resilient communication protocols for your sensors, and fortifying your digital network against intrusion.
This guide will walk you through each layer of this architecture. We’ll explore why visible deterrence works, how to master local recording, which sensor technologies to trust, and the critical network security steps most people miss. By the end, you’ll have a blueprint for a robust, private, and fee-free security system that you—and only you—control, a system so versatile it can even be adapted for proactive family care.
This article provides a comprehensive roadmap to building your own independent security ecosystem. Explore the sections below to master each component, from physical placement to digital defense.
Summary: A Guide to Subscription-Free Home Security
- Why Visible Cameras Are More Effective Than Hidden Ones?
- How to Record Security Footage Locally to Avoid Cloud Leaks?
- WiFi vs Zigbee Sensors: Which Is More Reliable for Alarms?
- The Default Password Mistake That Lets Hackers See Your Living Room
- How to Position Motion Sensors to Avoid False Alarms from Pets?
- WiFi vs Z-Wave: Which Sensor Protocol Penetrates Basements Better?
- Home Care vs Nursing Home: How to Make the Right Choice for Mom?
- How to Set Up Voice Control to Assist Elderly Relatives at Home?
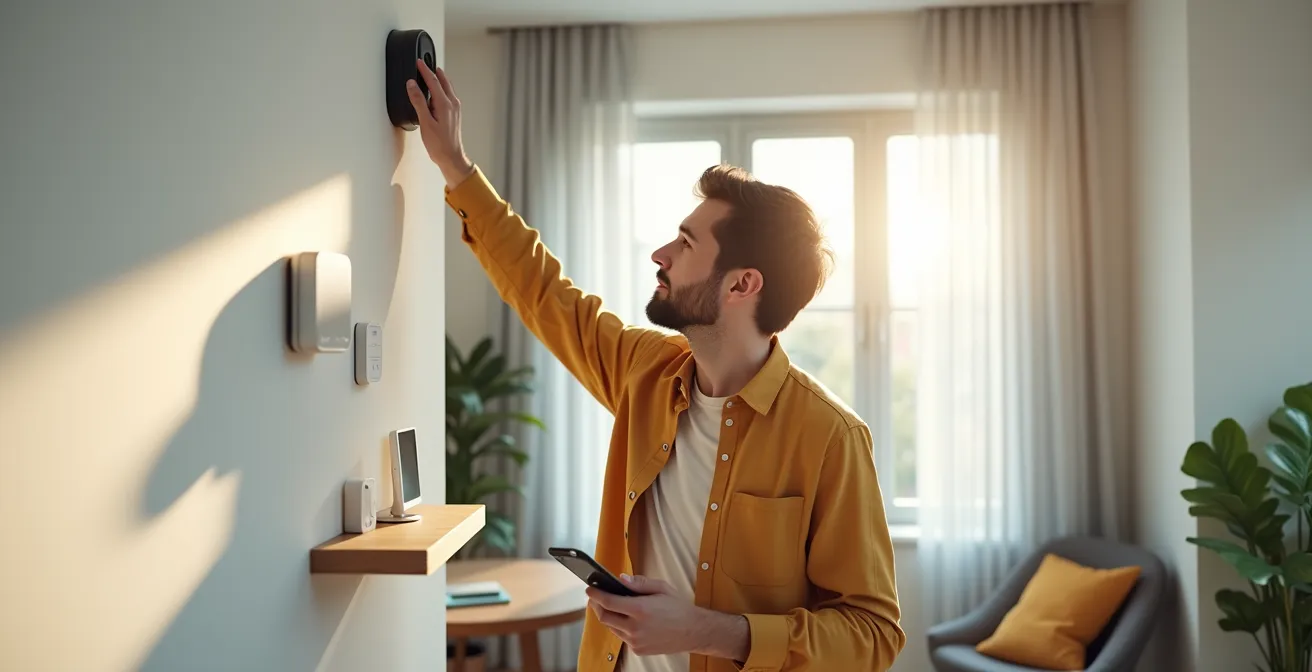
Why Visible Cameras Are More Effective Than Hidden Ones?
The first layer of any effective security ecosystem is deterrence. While the idea of a hidden camera might seem clever, its primary function is to record a crime in progress. A visible camera, on the other hand, aims to prevent the crime from ever happening. The psychological impact of visible surveillance is a powerful and well-documented tool. It signals that a property is monitored and presents a high risk for potential intruders.
The goal is to make your home an unattractive target from the outset. According to a University of North Carolina study, this is not just a theory; it’s a proven strategy. The study found that nearly 60% of convicted burglars said they would choose another target if they spotted a security camera. This principle scales from commercial properties to residential homes, where data shows that properly placed cameras can deter a staggering 94% of attempted intrusions.
For maximum effect, placement is key. Cameras should be installed at a height of 8-10 feet—high enough to prevent tampering but low enough to be clearly seen and capture useful detail. They should be angled downward to focus on your property’s entry points, such as the front door, ground-floor windows, and back gates. This not only maximizes their deterrent effect but also respects your neighbors’ privacy by avoiding recording their property or public spaces. A visible camera acts as a silent guardian, working 24/7 to turn criminals away before they even set foot on your property.
How to Record Security Footage Locally to Avoid Cloud Leaks?
The core of a subscription-free security model is data sovereignty: you own and control your footage. Cloud storage, while convenient, introduces costs, privacy risks, and a dependency on a third-party company. Recording locally puts you in complete command. The two primary methods for this are using a Network Video Recorder (NVR) or Network-Attached Storage (NAS).
An NVR is a purpose-built device designed for plug-and-play simplicity with compatible cameras. A NAS is a more versatile mini-server that can handle surveillance alongside other tasks like file backups and media streaming, often with more advanced software like Synology Surveillance Station. The choice depends on your technical comfort and budget, but both options eliminate monthly fees entirely.
To truly secure your footage, simply recording it isn’t enough. You need a robust backup strategy. The gold standard is the 3-2-1 rule: keep at least three copies of your data, on two different types of media, with one copy stored off-site. For security footage, this could mean the primary recording on your NVR/NAS, a secondary backup on an external USB drive, and a third, encrypted copy stored at a trusted location like an office or a relative’s home. This multi-layered approach ensures your evidence is safe even if the primary recording device is stolen or destroyed.
The following table breaks down the key differences between a dedicated NVR and a multi-purpose NAS to help you decide which path is right for your security ecosystem.
| Factor | Dedicated NVR | Multi-Purpose NAS |
|---|---|---|
| Initial Cost | $200-500 | $300-800 |
| Ease of Setup | Simple, plug-and-play | Moderate, requires configuration |
| Power Consumption | 15-30W | 30-60W |
| Software Capabilities | Basic recording/playback | Advanced features (Synology Surveillance Station) |
| Expandability | Limited to cameras | Multiple uses beyond surveillance |
| Total 5-Year Cost | $350-650 | $500-1100 |
WiFi vs Zigbee Sensors: Which Is More Reliable for Alarms?
While cameras provide visual evidence, your alarm system’s reliability hinges on its sensors—the digital tripwires that detect intrusion. Here, the choice of communication protocol is critical. Many DIY systems rely on WiFi for everything, but for essential devices like door/window contacts and motion sensors, this can be a mistake. WiFi is a power-hungry, “chatty” protocol designed for high-bandwidth data, not for the mission-critical, low-power needs of an alarm sensor.
This is where protocols like Zigbee excel. Zigbee is designed specifically for low-power IoT devices. Instead of a direct connection to a router (a “star” network), Zigbee devices form a “mesh” network where each mains-powered device (like a smart plug or lightbulb) acts as a repeater. This creates a self-healing, highly resilient network that gets stronger as you add more devices. If one path to the hub is blocked, the signal simply finds another route.

The most significant advantage of this low-power design is battery life. A WiFi door sensor might last a few months, creating a constant maintenance headache. In contrast, a study of commercial deployments showed that commercial-grade Zigbee sensors deliver 2 years of battery life even with 40 triggers per day. This incredible efficiency, achieved with processors that draw minuscule power in sleep mode, led one hotel to reduce its sensor maintenance costs by 75%. For a homeowner, this translates to set-and-forget reliability for years at a time.
The Default Password Mistake That Lets Hackers See Your Living Room
Building a physically secure home is pointless if you leave the digital front door wide open. The single most common and dangerous mistake homeowners make is failing to change the default administrator password on their cameras and router. Hackers constantly scan the internet for devices using default credentials like “admin/admin,” giving them instant access to your private video feeds. This is not a theoretical threat; it’s the primary way home security systems are compromised.
Securing your system requires creating a “digital moat” around your home network. This goes beyond just strong passwords. Experts recommend adopting a “Zero Trust” policy, which means treating every device on your network as potentially hostile. One of the most powerful techniques for this is network segmentation. By creating a separate VLAN or Guest WiFi network exclusively for your IoT devices (cameras, sensors, smart plugs), you isolate them from your personal computers and phones. This way, even if a camera is compromised, the attacker cannot move laterally to access your sensitive personal data.
True network security is an active process of hardening your defenses. This includes disabling insecure router features like UPnP and Port Forwarding, which can expose your devices directly to the internet, and setting up a personal VPN for secure remote access instead. Following a structured audit checklist is the best way to ensure all potential vulnerabilities are addressed.
Your DIY Digital Security Audit Checklist
- Create a separate VLAN or Guest WiFi network exclusively for IoT devices to isolate them from your main network.
- Disable UPnP (Universal Plug and Play) and any unnecessary Port Forwarding rules on your router to prevent direct internet exposure.
- Change all default administrator passwords on your router, cameras, and NVR to unique, complex combinations immediately after setup.
- Log into each camera’s web interface and disable unneeded services like FTP or Telnet, which are potential security holes.
- Set up a personal VPN (like Tailscale or your router’s built-in server) for all remote access to your cameras, never exposing them directly.
How to Position Motion Sensors to Avoid False Alarms from Pets?
A security system that constantly cries wolf is worse than no system at all. False alarms, often triggered by pets, erode your trust in the system and can lead to you ignoring a genuine threat. The key to pet-friendly motion detection is a combination of strategic placement, the right technology, and intelligent configuration. Simply buying a sensor labeled “pet-immune” is not a complete solution.
The first step is placement. Standard Passive Infrared (PIR) sensors detect heat signatures. To avoid detecting pets, they should be mounted higher than usual, at 7-8 feet, and angled slightly downward. This creates a detection zone that a human will walk through, but a pet on the floor will pass under. You can also create designated “pet alleys”—hallways or areas where sensors are either less sensitive or inactive, allowing your pets to roam freely without triggering an alarm.
For higher accuracy, technology choice is crucial. Dual-technology sensors, which combine a PIR sensor with a microwave sensor, are far more reliable. These require both technologies to trigger simultaneously to confirm an alarm, drastically reducing false positives from pets or environmental changes. For the ultimate in pet immunity, modern AI-powered cameras with person detection can serve as the primary trigger, ignoring animals, swaying trees, and changing shadows entirely. These advanced options allow you to build a system that is both highly sensitive to threats and intelligently blind to your furry family members.
This table compares the effectiveness of different sensor technologies in a home with pets.
| Sensor Type | Pet Immunity | False Alarm Rate | Best Use Case |
|---|---|---|---|
| Standard PIR | Limited (up to 40 lbs) | Medium | High wall mounting |
| Dual-Tech PIR/Microwave | Good (up to 60 lbs) | Low | Main living areas |
| Pressure Mats | Excellent (weight threshold) | Very Low | Under valuables |
| AI Camera Detection | Excellent (visual recognition) | Very Low | Primary trigger system |
| Microwave Only | Poor | High | Not recommended with pets |
WiFi vs Z-Wave: Which Sensor Protocol Penetrates Basements Better?
Just as Zigbee offers superior reliability for general-purpose sensors, another mesh protocol, Z-Wave, has a unique physical advantage for challenging environments like basements and garages. The difference lies in the radio frequency they use. WiFi and Zigbee both operate in the crowded 2.4 GHz band, which is susceptible to interference from microwaves, cordless phones, and neighboring WiFi networks. This frequency also has more difficulty penetrating dense materials like concrete and brick.
Z-Wave, however, operates on a much lower frequency. It uses the sub-1 GHz band (around 900 MHz in North America), which has two key benefits. First, this band is far less crowded, leading to less interference and a more stable signal. Second, as a fundamental principle of physics, lower-frequency radio waves are better at penetrating solid objects. This makes Z-Wave an inherently better choice for placing critical sensors, like flood or sump pump failure detectors, in a concrete basement where a WiFi or even a Zigbee signal might struggle to reach.
Before committing to a full system, it’s wise to “test before you invest.” Purchase a single Z-Wave hub and a water leak sensor. Place the sensor in the most challenging location in your basement and use the hub’s diagnostic tools to check the signal strength. If the signal is weak, you can strategically place mains-powered Z-Wave devices like smart plugs or light switches on the floor above to act as repeaters, creating a “stepping stone” mesh path for the signal to reliably reach the hub. This methodical approach ensures your basement, a common source of catastrophic home damage, is properly monitored.
Key takeaways
- Visible cameras are a powerful deterrent, aiming to prevent break-ins before they happen.
- Local storage via NVR or NAS is the cornerstone of a subscription-free system, granting you full control over your private data.
- For critical alarms, low-power mesh protocols like Zigbee and Z-Wave offer far greater reliability and battery life than standard WiFi.
Home Care vs Nursing Home: How to Make the Right Choice for Mom?
When facing the difficult decision between arranging home care or moving a loved one to a nursing home, technology can fundamentally change the equation. A well-designed, subscription-free smart home system—the same one you build for security—can be repurposed as a powerful, non-intrusive wellness monitoring tool. This can significantly enhance the safety and viability of aging in place, often delaying or even eliminating the need for a nursing facility while preserving dignity and independence.
The key is to shift from surveillance to proactive wellness monitoring using the same types of sensors. Instead of watching a camera feed, you create automated, privacy-first alerts. A motion sensor in a hallway can be configured to send a notification if no movement is detected by a certain time in the morning, suggesting a potential fall or illness. A contact sensor on a medicine cabinet can confirm that medication has been accessed on schedule. A sensor on the refrigerator door provides passive assurance that your loved one is eating regularly. This is about monitoring patterns and routines, not people.
Case Study: The Smart Home as a Digital Caregiver
Security systems are increasingly being repurposed as wellness monitoring tools for elderly relatives. In one documented success, a family used a system of non-visual sensors to support an aging parent at home. Motion sensors detected prolonged periods of inactivity, contact sensors on the coffee maker and medicine cabinet provided passive wellness checks, and bed occupancy sensors ensured regular sleep patterns. This privacy-first approach, which relied on alerts like “coffee maker not activated by 9 AM,” provided peace of mind without the intrusion of cameras, successfully and safely delaying the need for nursing home placement by two years.
This approach transforms your security hardware into a system of care. Automated lighting schedules can prevent falls at night, water leak sensors can avert disasters in the bathroom, and the entire system provides a safety net that empowers elderly relatives to live independently for longer. It’s the ultimate expression of a security ecosystem—protecting not just property, but people.
How to Set Up Voice Control to Assist Elderly Relatives at Home?
The final layer in making a smart home system truly accessible, especially for elderly relatives who may not be comfortable with smartphones, is voice control. Integrating voice assistants like Alexa, Google Assistant, or Siri transforms complex actions into simple, natural language commands. This hands-free interface can be a game-changer for convenience, safety, and emergency response, acting as a friendly and immediate link to the home’s core functions.
The setup should focus on simplicity and utility. Instead of technical commands, create intuitive phrases. For example, “Alexa, I’m leaving” can trigger a routine that locks the doors, arms the security system, and turns off the lights. More importantly, you can program a critical emergency phrase like, “Hey Google, send help,” which could automatically send a text message to multiple family members, flash the home’s lights, and activate a siren.

Voice control also facilitates proactive security and wellness checks. You can configure the system to provide helpful reminders or ask questions, such as, “It’s 10 PM and the back door is still unlocked. Should I lock it?” or allow a simple status check like, “Hey Siri, are all the windows closed?” This turns the smart home from a passive system into an interactive assistant, reducing cognitive load and enhancing peace of mind for both the resident and their family.
- Create simple, natural language commands like “Alexa, I’m leaving” to arm the entire system in one step.
- Program an emergency phrase such as “Hey Google, send help” that triggers a multi-step response (e.g., alerts family, flashes lights).
- Set up voice shortcuts for viewing specific camera feeds on a smart display, like “Show me the front door.”
- Enable voice-activated lighting control for pathways to the bathroom or kitchen to prevent falls during the night.
Now that you have the complete blueprint, you can move from being a passive consumer of security services to the active architect of your own secure, intelligent home. Start by auditing your current setup and take the first step towards true digital independence and peace of mind.