Successfully switching an older home to a heat pump is less about the hardware and more about a forensic audit of your home’s unique heat loss.
- Generic sizing rules are the #1 cause of failure; a bespoke heat-loss calculation is non-negotiable.
- A hybrid system can be a smart, pragmatic choice for homes with poor insulation or original radiators.
Recommendation: Before calling any installer, conduct a DIY thermal pre-audit to understand your home’s weak points and prepare for an informed discussion.
The idea of replacing an old, reliable gas boiler with a modern heat pump can feel daunting for owners of older properties. You’ve heard the promises of lower carbon emissions and high efficiency, but you’ve also heard whispers of chilly rooms and skyrocketing electricity bills. The common advice—to simply “improve your insulation”—is both true and unhelpful. It misses the fundamental point that older homes are complex thermal systems with their own unique quirks and behaviors. A successful transition isn’t about a simple appliance swap; it’s a systems engineering project.
The reality is that many homeowners are let down by one-size-fits-all approaches. They are sold a unit based on square footage alone, without a proper understanding of their home’s air tightness, thermal bridges, or existing radiator capacity. This often leads to a system that is either oversized and inefficient or, worse, undersized and reliant on expensive backup heating precisely when you need it most. The key isn’t to fear the technology, but to master the process that precedes the installation.
This guide rejects the platitudes. We will delve into the technical realities of making a heat pump work—and work brilliantly—in a property that wasn’t built for it. We will treat your home like what it is: a unique engineering challenge. By understanding the principles of thermal audits, the nuances of system sizing, and the strategic choices between different technologies, you can move from a place of anxiety to one of control. This article will walk you through the logical steps an engineer would take, empowering you to ask the right questions and make the best decisions for your home’s future.
This comprehensive guide details the essential steps and technical considerations for a successful heat pump transition in an older building. Below is a summary of the key topics we will cover to ensure your project is a success from audit to operation.
Summary: A Technical Guide to Heat Pump Transition in Older Homes
- Why Heat Pumps Are Over 300% Efficient Compared to Gas?
- How to Conduct a Thermal Audit Before Buying a Heat Pump?
- Hybrid System vs Full Electric: Which Is Best for Cold Climates?
- The Sizing Mistake That Leaves You Cold in February
- When to Schedule Your Install to Maximize Government Grants?
- Smart Thermostat for Heat Pump vs Gas: What Is the Wiring Difference?
- Why Your Old “Energy Saving” Bulbs Are Still Costing You Too Much?
- How to Reduce HVAC Costs by 15% With a Smart Thermostat?
Why Heat Pumps Are Over 300% Efficient Compared to Gas?
The concept of a heating system being more than 100% efficient often sounds like it defies the laws of physics, but it’s the very principle that makes heat pumps revolutionary. A high-efficiency gas boiler, at its best, converts about 94% of its fuel into useful heat. The remaining 6% is lost up the flue. A heat pump, however, doesn’t primarily *create* heat; it *moves* it. Using a refrigeration cycle, it absorbs ambient heat from the outside air, ground, or water, concentrates it, and releases it inside your home. This process of moving heat is far more efficient than generating it from scratch.
This efficiency is measured by the Coefficient of Performance (COP). A COP of 3 means that for every 1 kilowatt (kW) of electricity the pump consumes, it delivers 3 kW of heat to your home. This is why it’s not uncommon for heat pumps to be 3-5 times more energy efficient than gas boilers, according to the International Energy Agency. They are effectively leveraging “free” energy from the environment. The electricity is just used to run the pump, compressor, and fan that facilitate this heat transfer.
However, this incredible efficiency is not a constant. It is directly tied to the outdoor temperature. As the air gets colder, there is less heat to absorb, and the pump must work harder, causing the COP to drop. As a case in point, the US Department of Energy’s Cold Climate Heat Pump Challenge spurred the development of a prototype that can deliver 100% of its heating capacity at 5°F (-15°C) but drops to 70-80% capacity at -10°F (-23°C). This performance curve is the single most important factor for an older, potentially less-insulated house, and it’s why a simple efficiency claim is never the full story.
Understanding this dynamic relationship between outdoor temperature and performance is the first step in appreciating why a detailed thermal audit is not just recommended, but essential.
How to Conduct a Thermal Audit Before Buying a Heat Pump?
Compile a list of any existing problems in your home, such as drafty rooms or condensation, to raise with the energy auditor.
– NYSERDA, New York State Energy Research and Development Authority Guide
Before you can properly size a heat pump, you must first understand its adversary: your home’s heat loss. In an old house, this is a complex puzzle of drafts, poor insulation, and thermal bridges. A professional thermal audit, often called a heat-loss calculation or a Manual J calculation in the US, is a forensic investigation. It moves beyond guesswork to quantify exactly how many BTUs or kW your home loses on the coldest day of the year (the “design temperature”). This single number dictates everything that follows. The auditor will measure rooms, windows, and insulation levels and use a blower door test to measure air leakage (rated in ACH50, or air changes per hour at 50 pascals of pressure).
This process identifies the thermal weak points unique to your property. For a heat pump to work efficiently, it must be sized to match this specific heat loss, not a generic rule of thumb. An audit provides the blueprint for improvement, prioritizing upgrades that offer the most impact, whether it’s sealing a drafty attic hatch or adding insulation to an exposed wall. This diagnostic approach ensures you’re not just installing a new heater, but optimizing the entire thermal envelope of your home.
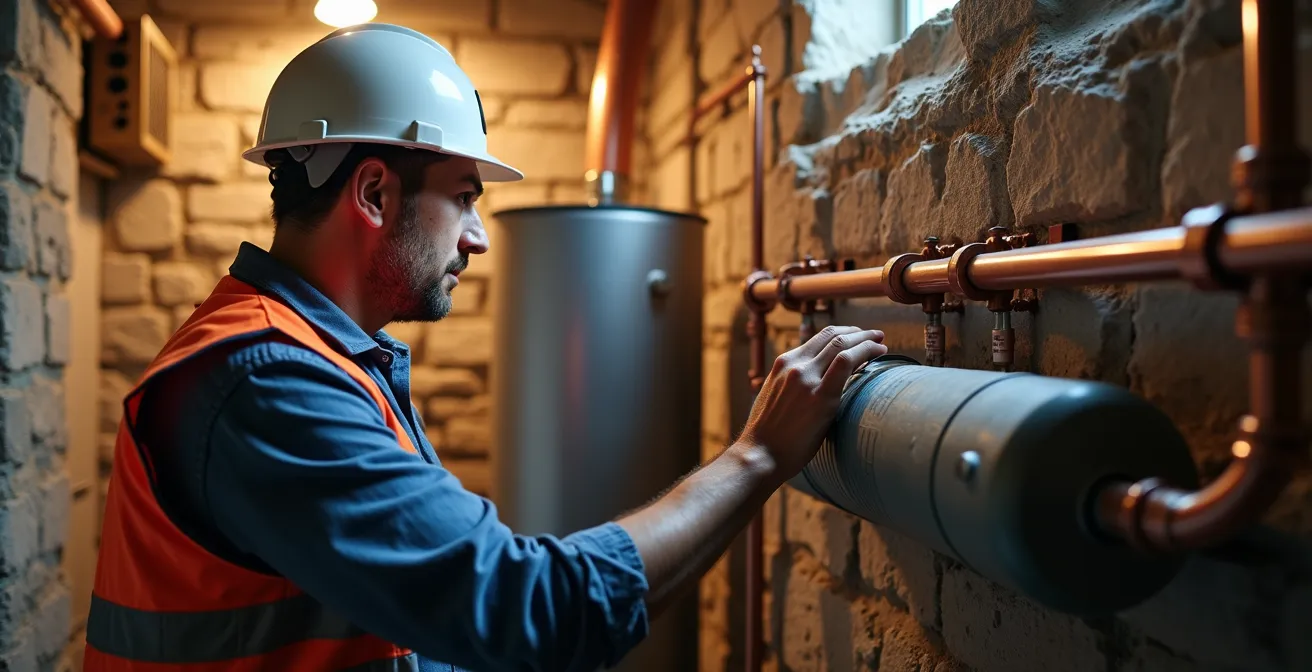
While a professional audit is non-negotiable, you can perform a preliminary investigation yourself to prepare for the conversation with an installer. This pre-audit will help you identify obvious problem areas and give you a much clearer picture of your home’s thermal behavior. This proactive step can save time and help you have a more productive discussion with the professionals.

As the image shows, using tools like an infrared thermometer can reveal hidden issues like missing insulation or air leaks that are invisible to the naked eye. Documenting these findings room-by-room creates an invaluable resource for your future installer.
Your Pre-Installation Thermal Audit Checklist: 5 Steps to Assess Your Home
- Draft Detection: On a cold, windy day, close all windows and doors. Dampen your hands and run them slowly around the edges of window frames, doors, and electrical outlets. Any cool sensation indicates a draft that needs sealing.
- Cold Spot Identification: Use an inexpensive infrared thermometer to scan walls, ceilings, and floors. Note any areas that are significantly colder than their surroundings. These are potential “thermal bridges” or areas with missing insulation.
- Insulation Check: Visually inspect and measure the depth of your loft or attic insulation. For most grant programs and optimal heat pump performance, a depth of at least 270mm (approx. 11 inches) is the target.
- Systematic Documentation: Create a simple floor plan and document your findings for each room, from the basement to the attic. Note specific issues like condensation on windows, visible drafts, or cold spots. This log is invaluable for your installer.
- Air Leakage Test: Carefully use an incense stick near potential leak points (window seals, door frames, pipe penetrations). Watch the smoke; if it’s drawn horizontally or flickers wildly, you’ve found a significant air infiltration point that needs to be sealed.
This preliminary work transforms you from a passive customer into an active participant in your home’s energy transition, ensuring the final system is tailored perfectly to your needs.
Hybrid System vs Full Electric: Which Is Best for Cold Climates?
Once you have a clear picture of your home’s heat loss, you face a critical decision, especially in colder climates: do you go for a full, all-electric heat pump system or a “hybrid” system that retains your gas boiler as a backup? This choice is not about which is “better” in the abstract, but which is the most pragmatic and effective engineering solution for your specific property. An all-electric system is the ideal for decarbonization, but it requires your home’s thermal envelope and heat emitters (radiators) to be up to the task.
A hybrid system, also known as a dual-fuel system, combines a new air-to-air heat pump with your existing gas or oil boiler. A smart controller automatically switches between the two based on outdoor temperature and energy prices. The heat pump handles the heating load for about 80% of the year. On the coldest days, when the heat pump’s efficiency drops, the system seamlessly switches to the boiler. This is particularly useful in old homes with original cast-iron radiators, which were designed to run at the very high temperatures that only a boiler can efficiently provide.
Conversely, a full all-electric system aims to remove fossil fuels entirely. This is the ultimate goal, but it often requires more significant upfront work. To be effective in cold weather, the home must be well-insulated to lower the total heating demand. Furthermore, you may need to replace standard radiators with larger, oversized models or fan-assisted units that work well with the lower flow temperatures (typically 35-55°C) produced by heat pumps. However, when done correctly, the results are significant; a study has shown that heat pumps in well-insulated Danish homes use 30% less electricity than those in poorly insulated ones.
The following table breaks down the key considerations to help you weigh the options for your home. It highlights the trade-offs between initial cost, long-term efficiency, and resilience.
| Feature | Hybrid System | Full Electric |
|---|---|---|
| Efficiency at -10°F | Maintains high efficiency by switching to gas | 70-80% capacity (latest models) |
| Initial Cost | Higher (two systems) | Lower (single system) |
| Redundancy | Gas backup for power outages | No backup unless generator |
| Carbon Reduction | 80% immediate reduction | 100% with renewable electricity |
| Best For | Houses with original radiators needing high temps | Well-insulated homes or those with oversized radiators |
Ultimately, the choice depends on your budget, risk tolerance, and how much renovation you’re willing to undertake. A hybrid system can be a fantastic, pragmatic first step, delivering massive carbon savings immediately while giving you time to plan future insulation upgrades.
The Sizing Mistake That Leaves You Cold in February
The single most critical error in a heat pump installation for an old house is incorrect sizing. Unlike a gas boiler, which can deliver massive amounts of heat on demand, a heat pump is a more finely tuned instrument. An oversized unit will “short-cycle”—turning on and off frequently—which is inefficient, causes premature wear, and fails to properly dehumidify the air. An undersized unit will fail to keep up on the coldest days, forcing heavy reliance on expensive auxiliary electric resistance heat (often called “heat strips”), which negates your efficiency gains entirely.
The mistake originates from installers using outdated rules of thumb, like a certain number of BTUs per square foot. These metrics are useless for an old house with its unique thermal signature. The only correct method is to use the heat-loss calculation from your thermal audit. The heat pump’s output capacity (in kW or BTUs) must be chosen to match your home’s heat loss at its specific outdoor “design temperature” (the realistic coldest temperature for your region).
To avoid this pitfall, you must become an educated client. You need to question your installer’s methodology and ensure they have performed a rigorous calculation. Asking specific, technical questions demonstrates that you understand the stakes and forces a higher level of accountability. The following list provides key questions to ask any potential installer about their sizing process.
- What external design temperature did you use for the heat loss calculation, and why did you choose it for my region?
- Can you walk me through why you selected this specific kW output for my property based on the calculation?
- Does your calculation account for my home’s specific solar gain (from windows) and internal heat sources (from appliances and occupants)?
- What is the modulating range of the proposed heat pump (its minimum to maximum kW output)?
- Have you included a buffer tank in the system design, and can you explain the reasoning for or against it?
Case Study: The Surprisingly Capable “Undersized” System
A fascinating case from Green Building Advisor involved a 1961-built house in Georgia with significant air leakage (8.4 ACH50, well above the modern code of 5). Despite the heat pump being technically undersized for the calculated load, it successfully maintained an indoor temperature of 63°F (17°C) when outdoor temperatures plummeted to an extreme 7°F (-14°C). This demonstrates that even a system not sized for the absolute worst-case scenario can provide substantial, life-sustaining heat, highlighting the nuance beyond simple pass/fail sizing.
In many older homes with high-volume cast iron radiators, a buffer tank is included in the system design. This is a small water tank that acts as a thermal battery, preventing the heat pump from short-cycling and providing a more stable operating environment. The professional installation of this component is critical to system longevity and efficiency.
By insisting on a transparent, calculation-based approach, you can avoid the most common and costly mistake in heat pump retrofitting.
When to Schedule Your Install to Maximize Government Grants?
Once you have a technically sound plan, the final piece of the puzzle is financing. Government grants, rebates, and tax credits are powerful tools for making a heat pump transition affordable, but they are not simple discounts. They are strategic incentives that often come with strict technical requirements and time-sensitive application windows. Timing your project to align with these programs is crucial to maximizing your return on investment.
Incentive programs vary dramatically by country, state, and even municipality. They can be structured as upfront rebates, tax credits claimed at the end of the year, or low-interest loans. For instance, in the United States, the Inflation Reduction Act introduced significant incentives where new rebates for low- and middle-income households will provide up to $8,000 for heat pump installation. These programs often open for applications at specific times of the year and can have funding caps, meaning it’s “first come, first served.”
Crucially, these grants often come with strings attached that are particularly relevant for old houses. Your project may need to meet minimum efficiency standards (SEER/HSPF ratings) or, more commonly, your home may need to meet a minimum level of insulation or air tightness *before* you can qualify. This ties directly back to the importance of the thermal audit. The audit not only guides the technical design but also serves as the necessary proof for grant eligibility.
Case Study: The Massachusetts $10,000 Catch
The state of Massachusetts offers a generous $10,000 rebate per heat pump unit, a massive incentive for homeowners. However, to qualify, homeowners must agree to either remove their existing fossil fuel heating system entirely or use it only for emergencies with pre-approval. Furthermore, the program has strict pre-approval requirements tied to minimum insulation levels, which many older houses do not initially meet. This highlights a critical reality: sometimes, the path to a large grant requires investing in insulation upgrades first, a step your thermal audit would have already identified.
The best strategy is to start researching available incentives well in advance. Work with an installer who is experienced with the application process for local programs. Scheduling your audit and any required insulation work during the off-season (spring or fall) can ensure you are ready to apply the moment a new round of funding opens.
Smart Thermostat for Heat Pump vs Gas: What Is the Wiring Difference?
The control center for your new heating system is the thermostat, but a thermostat designed for a heat pump is fundamentally different from the simple one that controlled your old gas boiler. The wiring behind the wall reflects this complexity. Understanding this difference is key to appreciating how a smart thermostat can unlock a heat pump’s full efficiency potential. A typical gas boiler uses a very simple two-wire system: one wire (usually ‘R’ for power) and another (‘W’ for heat) which creates a simple on/off circuit. When the room is cold, the circuit closes, the boiler fires up. When it’s warm, it opens, and the boiler shuts off.
A heat pump, however, is a multi-stage system that requires more sophisticated communication. The thermostat needs to tell the system not just to turn on, but *how* to run. This requires more wires:
- ‘C’ (Common) Wire: Unlike a simple boiler thermostat, a modern smart thermostat needs a constant 24V power supply to run its screen and Wi-Fi. The ‘C’ wire provides this, and it’s often missing in older homes, requiring an electrician to run a new wire or use an adapter.
- ‘Y’ (Compressor) Wire: This tells the outdoor unit’s compressor to run. Some high-efficiency systems have a ‘Y1’ and ‘Y2’ for two stages of cooling or heating.
- ‘O/B’ (Reversing Valve) Wire: This is the magic switch. It tells the reversing valve whether to be in heating mode or cooling mode, determining if heat is absorbed or rejected from the indoor coil.
- ‘AUX’ or ‘W2’ (Auxiliary Heat) Wire: This controls the expensive-to-run electric resistance heat strips. Proper control of this wire is the single most important function of a heat pump thermostat.
This more complex wiring allows a smart thermostat to make intelligent decisions. It can learn to use the most efficient stage of the heat pump for as long as possible, only calling on the auxiliary heat as an absolute last resort. This orchestration is impossible with a simple on/off thermostat, which might panic and turn on the costly heat strips far too early. That’s why pairing a heat pump with a generic smart thermostat is a missed opportunity; you need one specifically designed to manage a multi-stage, dual-fuel, or auxiliary heat system.
Ensuring your installation includes the correct wiring and a compatible smart thermostat is not an add-on; it’s an integral part of the system’s core design.
Why Your Old “Energy Saving” Bulbs Are Still Costing You Too Much?
When engineering a heat pump solution for an older home, every single watt counts. Your heat loss calculation is a tally of all the energy your home leaks to the outside world. While we focus on big items like windows and insulation, the “base load” of your home’s energy consumption, including lighting, plays a subtle but important role. Reducing this base load makes the job of your new heat pump easier and can even influence the size of the unit required. This is why addressing seemingly small items, like your light bulbs, is part of a holistic, systems-thinking approach.
Many homeowners switched to Compact Fluorescent Lamps (CFLs) a decade ago, believing they were making the final “energy-saving” upgrade. However, technology has moved on. Modern LED (Light-Emitting Diode) bulbs are now significantly more efficient than CFLs. An LED bulb uses about half the electricity of a CFL to produce the same amount of light, and it lasts much longer. Furthermore, CFLs contain a small amount of mercury, making disposal a hassle, and they take time to reach full brightness—a common annoyance.
Switching from CFLs to LEDs across your entire home might seem like a small change, but the cumulative effect is a meaningful reduction in your daily electricity consumption. More importantly, in the context of a heat pump, it’s about mindset. Every watt you save in lighting is one less watt of heat your home’s occupants and appliances are generating internally. While minor, this “internal gain” is a factor in a precise heat-loss calculation. By minimizing your lighting load, you are contributing to a lower overall energy demand, which is the foundational goal of the entire project. It reinforces the principle that a successful heat pump transition is about optimizing the entire house as an integrated system, not just the HVAC equipment.
This small upgrade is an easy win that aligns perfectly with the broader goal of maximum efficiency and a reduced load on your new, sophisticated heating system.
Key Takeaways
- A heat pump transition is an engineering project, not an appliance swap; a forensic thermal audit is the mandatory first step.
- Sizing must be based on a precise heat-loss calculation for your specific home, not generic rules-of-thumb.
- A hybrid system using your existing boiler as a backup can be a pragmatic and highly effective solution for older, less-insulated homes.
- Government grants are strategic tools with technical prerequisites; timing and planning are essential to maximize their value.
How to Reduce HVAC Costs by 15% With a Smart Thermostat?
You’ve navigated the audit, chosen the right system, and ensured it’s perfectly sized. The final step is to operate it intelligently. This is where a smart thermostat designed *specifically for heat pumps* becomes your most powerful tool for cost control, capable of reducing your HVAC operational costs by a significant margin. The savings don’t come from simply setting back the temperature at night; they come from its deep understanding of how to manage the unique components of your new system.
The primary way a smart thermostat saves money is by aggressively managing the auxiliary heat strips. It learns your home’s thermal properties—how quickly it loses heat—and can decide to run the highly efficient heat pump for a longer, continuous period to slowly raise the temperature, rather than panicking and calling for the expensive “AUX” heat to get a quick boost. Some thermostats even use weather forecast data to pre-heat the house before a major cold front arrives, avoiding a desperate call for auxiliary power.
Furthermore, these thermostats leverage modern features to eliminate wasted energy. Geofencing uses your phone’s location to automatically lower the temperature when the house is empty and begin recovery just before you arrive home. Advanced learning algorithms track your real usage patterns, creating a schedule that optimizes comfort and savings without you ever touching the dial. For hybrid systems, it can make sophisticated economic decisions, automatically switching from the heat pump to the gas boiler when the outside temperature drops to a point where gas becomes the cheaper fuel source to run. By orchestrating all these elements, the thermostat ensures you are always using the most efficient heating method available at any given moment.
Investing in a quality, heat-pump-compatible smart thermostat is not a luxury; it is the essential final step to unlock the full financial and environmental benefits of your transition away from fossil fuels. Begin your journey by conducting a preliminary audit to understand your home’s needs and prepare for a successful, cost-effective upgrade.