Heirlooms are not just memories; they are forensic evidence waiting to be decoded.
- Family legends are often inaccurate, requiring you to verify every story with primary source documents.
- A systematic “Object to Document” method turns physical clues into searchable genealogical data.
Recommendation: Stop treating heirlooms as sentimental clutter. Start treating them as the first clue in a historical investigation to uncover your family’s authentic past.
That inherited box sitting in your attic—filled with tarnished medals, brittle letters, and photos of anonymous faces—is more than just a collection of memories. For most people, it’s a source of both fascination and overwhelming anxiety. The common advice is to digitize everything and ask a few questions, but this barely scratches the surface. It treats these artifacts like nostalgic decorations rather than what they truly are: primary evidence in a historical investigation.
The real challenge isn’t just preservation; it’s decoding. It’s about understanding the silent stories these objects tell and using them to navigate the complex, often misleading, world of family history. Many genealogists hit a wall because they rely too heavily on oral traditions or get lost in a sea of unorganized digital scans. They collect facts but fail to connect them into a coherent, verifiable narrative.
But what if the key wasn’t simply to store these items, but to interrogate them? What if you adopted the mindset of a forensic investigator, where each object is a clue, each photograph a crime scene, and each family story a testimony to be cross-examined? This approach transforms the process from a passive hobby into an active pursuit of truth. It prioritizes a critical methodology: starting with the physical artifact, using its clues to find official documents, and then using those documents to place the artifact and its owner in a verified historical context.
This guide will walk you through that forensic process. We will explore how to halt the physical decay of your evidence, conduct effective “interrogations” of your relatives, build a collaborative digital archive, and, most importantly, learn to distinguish between sentimental myth and documented fact. It’s time to unlock the real stories hidden in plain sight.
This article provides a structured path, from immediate preservation actions to the complex human dynamics of family history. Follow along to transform your inherited artifacts into a detailed and accurate family tree.
Summary: Unlocking Your Ancestry Through Forensic Analysis of Heirlooms
- Why Storing Photos in Magnetic Albums Destroys Them?
- How to Interview Grandparents About Objects Before It’s Too Late?
- Physical Box vs Cloud Scan: How to Share Heirlooms With Cousins?
- The “Family Legend” Trap That Leads Genealogy Astray
- Where to Start: The Object or the Document?
- When to Start the “Will and Inheritance” Conversation?
- How to Remember What You Read Using the Feynman Technique?
- How to Navigate the “Sandwich Generation” Stress Without Breaking Down?
Why Storing Photos in Magnetic Albums Destroys Them?
Those “magnetic” photo albums from the 1970s and 80s, with their sticky pages and plastic overlays, are one of the greatest threats to your family’s visual history. They are not magnetic at all; the pages contain a pressure-sensitive adhesive that is highly acidic. The plastic cover is typically made of Polyvinyl Chloride (PVC), which off-gases hydrochloric acid over time. This combination creates a chemical-rich microenvironment that actively destroys your photographs from the moment they are inserted.
This process of degradation is not a matter of “if,” but “when.” In fact, preservation experts warn that photos stored in PVC magnetic albums can yellow and become brittle in as little as 10 to 15 years. The adhesive migrates into the paper fibers of the photo, causing discoloration and making the image impossible to remove without tearing. The plastic sheet traps moisture and airborne pollutants, accelerating the decay. Essentially, these albums are a ticking time bomb for your most precious visual heirlooms.
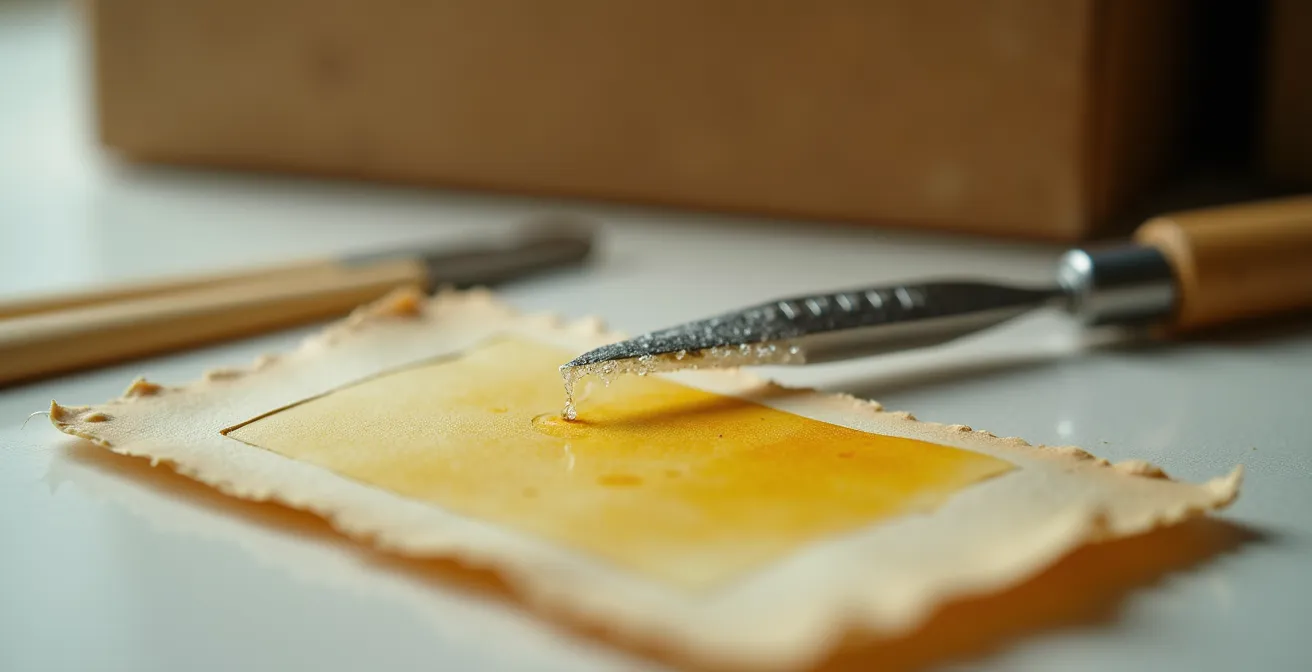
Recognizing the damage is the first step. Look for yellowing on the page and photo, a “vinegar” smell indicating acid breakdown, and photos that are fused to the page. Immediate action is required to salvage these images. The rescue process is delicate and requires patience, but it’s crucial for stopping further deterioration and preserving the artifactual evidence for your genealogical research. The goal is to safely liberate the photos so they can be properly archived and digitized, turning a deteriorating liability into a research asset.
Action Plan: The Photo Rescue Process
- Document the album’s original order by photographing each page before attempting removal.
- If photos are severely stuck, place the page in a freezer for 30 minutes to make the adhesive brittle.
- Gently slide a length of unwaxed dental floss between the photo and the page, using a soft sawing motion.
- For stubborn corners, carefully work a micro spatula blade under the photo, being careful not to bend or crease it.
- Use a rubber cement eraser (not a standard pencil eraser) to gently rub away any sticky residue from the back of the photo.
- Place a small slip of acid-free paper behind any remaining sticky spots to prevent the photo from re-adhering to other surfaces.
- Immediately scan the rescued photo at a high resolution (at least 1200 dpi in TIFF format) for archival-quality digital preservation.
By treating this as a critical preservation mission, you are not just saving a picture; you are saving a vital clue for your family’s history.
How to Interview Grandparents About Objects Before It’s Too Late?
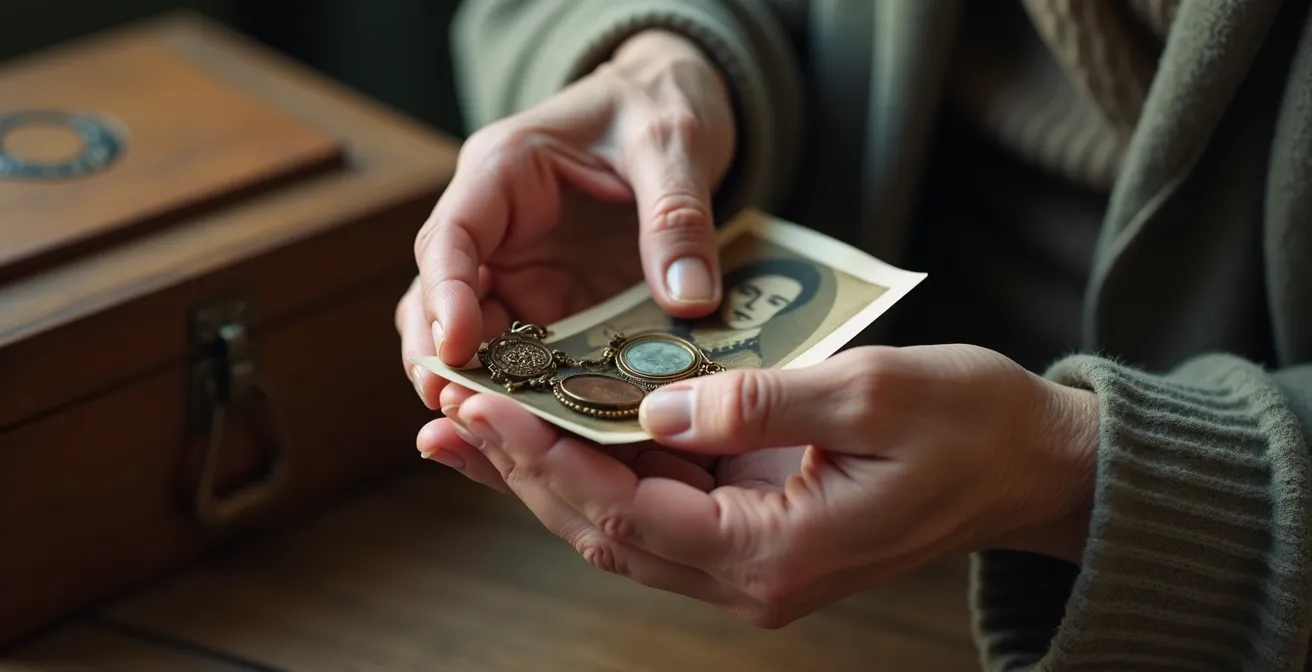
The most valuable stories in your family history are not written in books; they reside in the memories of your elders. However, asking a vague question like “Tell me about the past” often yields little more than silence or generalities. The key to unlocking rich, detailed narratives is to shift from abstract questions to concrete, object-based inquiries. An old watch, a faded quilt, or a military medal can serve as a powerful catalyst for memory, grounding the conversation in tangible reality.
This technique transforms an interview from an interrogation into a shared experience of discovery. Instead of putting a grandparent on the spot, you invite them to be the expert curator of their own life. As the organization FamilySearch highlights in its guide, this method is highly effective. They advise that “photos, objects, and heirlooms can serve as an interesting basis for interview questions.” Simply showing a photograph and asking, “What can you tell me about the people here?” or “Do you remember when this was taken?” is far more effective than asking about a specific year or event from memory.
Object-Centered Interview Success Story
The MyHeritage education platform documents how this method yields significantly more detailed responses than abstract questions. By presenting a family heirloom and asking specific questions—Whom did this belong to? Where was it acquired? What was it used for? What stories do you remember about it?—researchers can trigger a cascade of related memories. An inquiry about a simple kitchen tool might unfold into a detailed description of holiday preparations, revealing family traditions, recipes, and the names of relatives who gathered, information that would never have surfaced from a general question about “holidays.” This proves that objects are the keys that unlock the doors to forgotten rooms in memory.
Prepare for these conversations by selecting a few key objects beforehand. Don’t overwhelm your relative. Choose three to five items that you believe have a story. Start the recorder, place the object in their hands, and ask simple, open-ended questions: “What is this?” “Tell me about this.” “How did our family come to have this?” Then, the most important step is to listen actively. Let the silence hang; it often means a memory is forming. The stories that emerge will provide the names, dates, and context that are the lifeblood of genealogical research.
Ultimately, these conversations are not just about collecting data. They are a profound act of honoring a life and ensuring that a person’s legacy, tied to the objects they cherished, is not forgotten.
Physical Box vs Cloud Scan: How to Share Heirlooms With Cousins?
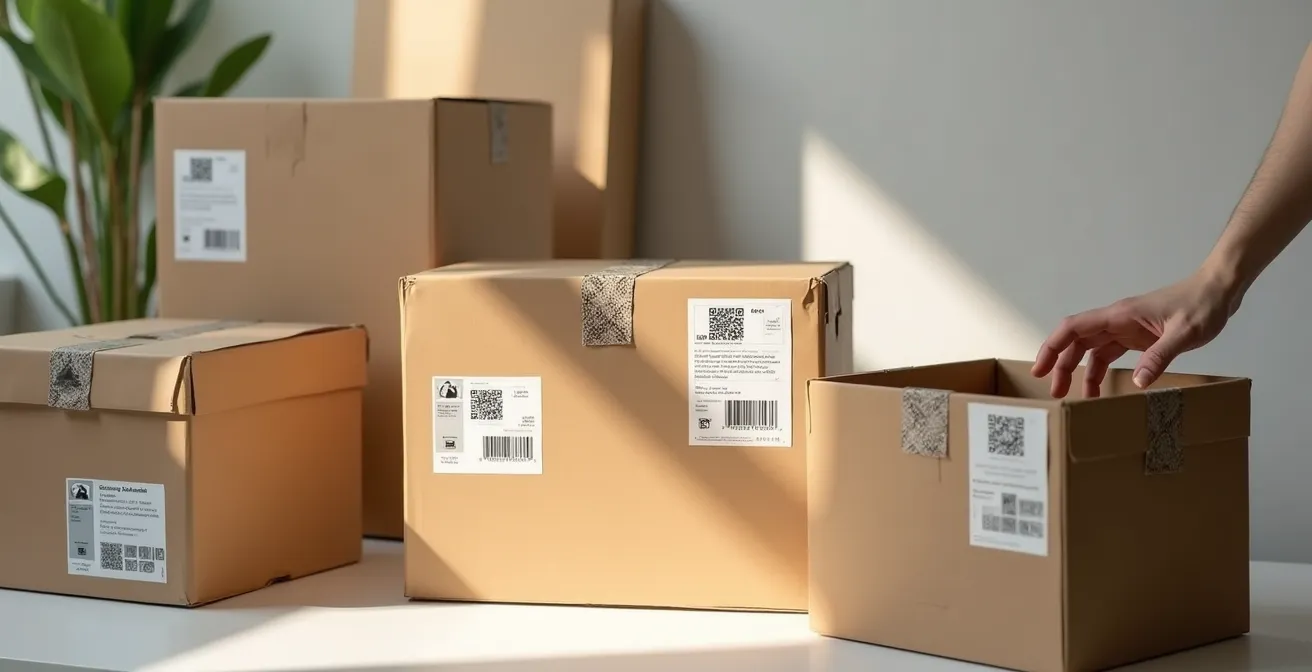
Once you’ve rescued and digitized your family heirlooms, the next challenge emerges: how to share this treasure trove with relatives scattered across the country or the globe. A single hard drive is a single point of failure, and a physical box can only be in one place at a time. The modern genealogist must build a bridge between the physical and the digital, creating a centralized, collaborative archive that honors the original artifacts while making their stories accessible to all.
The solution is a hybrid system. The physical items—the primary evidence—should be stored in archival-quality, acid-free boxes. But each box, and even significant individual items, can be linked to its digital counterpart using a simple system like QR codes. A cousin can scan a code on a photo album box and be instantly taken to a cloud folder containing high-resolution scans of every page, along with notes from your interviews. This creates a direct link between the tangible and the informational.
Choosing the right digital platform is crucial. It’s not just about storage; it’s about accessibility, collaboration, and long-term preservation. A simple service may be easy to use, but a dedicated genealogy platform offers features like metadata tagging, storytelling, and legacy access that are invaluable for a family history project.
To ensure your digital sharing strategy is effective and sustainable, it’s vital to compare platforms based on the specific needs of a family archive project. The following table breaks down some popular options, highlighting their strengths for genealogical collaboration.
| Platform | Best For | Storage | Collaboration Features | Cost |
|---|---|---|---|---|
| Google Drive | Basic file storage | 15GB free | Simple sharing | Free to $9.99/mo |
| Flickr | Photo metadata | 1000 photos free | Rich tagging system | Free to $8.25/mo |
| Tropy | Research annotation | Local storage | Academic collaboration | Free |
| FOREVER | Legacy preservation | Unlimited | Family access system | $139/year |
However, technology is only half the battle. A successful family archive requires a social contract. Create a “Family Digital Archive Charter” with your relatives, defining roles (who is the head archivist?), file naming conventions, and quality standards for new uploads. This transforms a solo project into a shared legacy.
The “Family Legend” Trap That Leads Genealogy Astray
Every family has them: grand stories of noble ancestors, Cherokee princesses, or cousins who were famous outlaws. These family legends are the heart of oral tradition, passed down through generations. While they are invaluable for the emotional connection they provide, from a genealogical perspective, they are a dangerous trap. Treating a family legend as fact without rigorous verification is the single most common mistake that leads researchers down frustrating and incorrect paths.
The truth is, most family legends are built on a kernel of truth that has been embellished, misremembered, or intentionally altered over time. Research shows the problem is widespread; genealogy verification experts note that approximately 60% of family legends contain significant factual errors. These stories often evolve to make the family’s past more palatable or more glamorous. An ancestor’s controversial marriage might be “upgraded” to a union with royalty, or a mundane immigration story might be transformed into a dramatic escape from persecution.
A classic example of this phenomenon is the pervasive “Cherokee Princess” myth. Many American families have a story of a Native American princess in their lineage. This serves as a powerful case study in how social values shape family lore.
The Cherokee Princess Myth Analysis
Genealogical research reveals that Native American tribes like the Cherokee had no equivalent to European royalty. So, where did the “princess” story come from? One compelling theory is that it was a way to cope with social prejudice. A few generations ago, having Native American ancestry was often seen as a shameful secret. Elevating the ancestor’s status to “princess” made the truth of an interracial marriage easier for descendants to accept. The legend reveals more about the social anxieties of the generation that created it than it does about the actual ancestor. This demonstrates a core principle of forensic genealogy: treat every legend not as a fact, but as a clue to the values and pressures of the past.
As a genealogical investigator, your job is to be a respectful skeptic. Listen to every story, write it down, and thank the teller. Then, take that story and treat it as a hypothesis. Use the names, dates, and locations mentioned as starting points for your research in primary source documents: census records, birth certificates, military files, and land deeds. The goal is not to “disprove” the legend but to discover the authentic story, which is often far more interesting and human than the myth.
By learning to separate fact from fiction, you honor your ancestors not by repeating flattering myths, but by uncovering the truth of their complex lives.
Where to Start: The Object or the Document?
When faced with a box of old photos and a list of ancestral names, the beginner genealogist often feels paralyzed. Should you start by digitizing the objects, or by diving into online record databases? The most effective approach is not a linear path but a cyclical one, a “Genealogical Flywheel” where the object and the document continuously inform each other. This method turns abstract names into real people and gives context to silent objects.
The process begins with the physical artifact. An old military medal is not just a piece of metal; it’s covered in clues. The design can identify the war and country. A maker’s mark on the back can pinpoint a city and a date range. This tangible information gives you your first set of search parameters. You aren’t just looking for “John Smith”; you’re looking for a John Smith who lived in a specific region during a specific time and could have served in a particular conflict. This drastically narrows your search in census records, military muster rolls, or local archives.
As the team at Ancestral Findings advises, you should always anchor your research in verifiable records. They state, “Start with the names and dates associated with them. Look up these people in the census records… Sometimes, the information you find in the census will tell you a lot about the truth behind the story.” Once you find your John Smith in the census, you might discover his occupation, the names of his wife and children, and his neighbors. This new data sends you back to your box of heirlooms with fresh eyes. That anonymous photo of a woman and child might now be identifiable as John Smith’s family. The flywheel has completed one turn.
This iterative cycle is the engine of genealogical discovery. An object provides a clue that leads to a document. The document provides names and dates that give context to other objects. Each discovery fuels the next, building a rich, cross-referenced history that is far more robust than a simple list of names and dates. It is the core methodology of forensic genealogy, transforming you from a data collector into a historical detective.
Your Forensic Genealogy Audit Checklist: The Flywheel Method
- Points of contact: Start with a single object and list all its physical clues (maker’s mark, style, material, inscriptions).
- Collecte: Use those clues to find at least one related primary source document (census, military record, patent).
- Cohérence: Confront the document’s information (names, dates, locations) with the family legend associated with the object.
- Mémorabilité/émotion: Identify what the object reveals that the document doesn’t (e.g., economic status, personal taste).
- Plan d’intégration: Use the new information from the document to re-examine other objects in your collection for new connections.
By letting the artifacts and documents “speak” to each other, you move beyond guesswork and begin to reconstruct the authentic world of your ancestors.
When to Start the “Will and Inheritance” Conversation?
Discussing wills, inheritance, and what happens to cherished possessions after a loved one is gone can be one of the most emotionally fraught conversations a family can have. It is often avoided until a crisis hits, leading to confusion, conflict, and the loss of irreplaceable family history. The key to navigating this sensitive topic is to reframe it. Instead of a morbid discussion about death and distribution, it can become a positive, life-affirming project about preserving stories and legacy.
The right time to start is now, but the right approach is indirect. Rather than opening with, “What do you want to do with your things?”, begin with a collaborative history project. Bringing out family heirlooms and asking about them transforms the context from estate planning to storytelling. This method not only feels more natural but is also far more productive for a genealogist.
Successful Heirloom Documentation Project
Research on interviewing elderly relatives shows that using artifacts as a focal point is highly effective. By bringing out scrapbooks, family bibles, letters, or immigration documents, you and your loved one can focus on specific questions together. Asking “Who gave you this?” or “What’s the story behind this photo?” can spark significant memories. You can then gently pivot the conversation by asking, “It’s so important that this story stays with this object. How can we make sure the next generation knows it?” This collaborative approach organically leads to discussions about who should inherit which items based on emotional connection and who is best suited to be the “keeper” of that item’s story.
This process creates an “emotional inventory” that is often more important than a financial one. As you document the stories, you can create a simple record—a spreadsheet or a document—listing the object, its story, and your relative’s wishes for its future. This document can then be shared with the executor of their will, ensuring that their intentions are clear and legally supported. This approach minimizes future conflict by making the distribution of items a fulfillment of a shared storytelling project, rather than a divisive scramble for assets.
By focusing on the story, not the stuff, you can transform a difficult obligation into a final, meaningful collaboration with your loved ones.
How to Remember What You Read Using the Feynman Technique?
Genealogical research generates a torrent of information: census records, wills, ship manifests, and newspaper clippings, all filled with dates, names, and places. A common frustration is the inability to retain and connect these disparate facts. You read a document, find a clue, but a week later, you can’t recall the specific detail or where you saw it. The Feynman Technique, a learning method developed by Nobel Prize-winning physicist Richard Feynman, offers a powerful solution for deeply embedding this information in your memory.
The technique is deceptively simple and rests on one core principle: you don’t truly understand something until you can explain it in simple terms. It’s an active process of synthesis, not a passive act of reading. For a genealogist, this means moving beyond simple data entry and transforming raw information into a coherent narrative. Instead of just noting that your ancestor was listed as a “cooper” in the 1880 census, you take the time to explain what a cooper did, what that meant for his life, and how that fact connects to other information you’ve found.
Applying this technique to your research involves a clear, four-step process. First, take all the documents you have for a single ancestor and study them. Second, put the documents away and write out that ancestor’s life story from memory, as if you were telling it to someone completely unfamiliar with genealogy. Use the simplest language possible. Third, and this is the crucial step, identify the gaps in your explanation. Where did you hesitate? What detail was fuzzy? What connection felt weak? This is where your understanding is incomplete. Fourth, return to your source documents to fill those specific gaps. Repeat the process until you can tell the entire story smoothly and confidently.
Action Plan: Feynman Technique Applied to Genealogy Research
- Gather all documents pertaining to one ancestor (e.g., census, military record, will).
- Write that ancestor’s complete life story in your own simple, narrative terms.
- Read the story aloud to a friend or family member who knows nothing about genealogy.
- Pay close attention to where you stumble, get confused, or can’t explain a connection clearly.
- Return to your research, focusing specifically on strengthening those weak points in your knowledge.
- For advanced recall, build a ‘mind palace’ room for that ancestor.
- Visually place key facts and documents as distinct objects within that mental room to create spatial memory hooks.
This method forces you to build a strong mental framework for each ancestor, transforming a list of facts into a memorable, interconnected biography.
Key Takeaways
- Adopt a “forensic” mindset: Treat heirlooms as evidence to be verified, not as sentimental truths.
- Prioritize object-based interviews to unlock specific, detailed memories from elderly relatives.
- Use a hybrid physical-digital archive system to both preserve artifacts and share information widely.
How to Navigate the “Sandwich Generation” Stress Without Breaking Down?
Embarking on a major genealogy project is a significant undertaking. For many people in the “Sandwich Generation”—those caring for aging parents while also supporting their own children—it can feel like an impossible addition to an already overwhelming plate. The pressure to capture family stories “before it’s too late” can create immense stress, turning a meaningful pursuit into another source of anxiety. The key to navigating this is not to do more, but to do less, more strategically. You must shift from a marathon mindset to a system of small, consistent, and collaborative efforts.
The first step is to abandon the idea that you have to do it all yourself. Genealogy is a team sport. As MyHeritage’s research guide suggests, you should not stop at one family member. Great-aunts, cousins, and even distant relatives can be a wealth of information. More importantly, they can be collaborators. Delegate age-appropriate tasks: a teenager can be in charge of scanning photos, an aunt can help transcribe old letters, and even your elderly parent can be given the simple task of sorting photos by person or decade. This approach transforms an overwhelming solo project into a multi-generational bonding experience, distributing the workload and strengthening family connections.
The second key is to break the monumental task of “researching the family” into a manageable, recurring system. The “One-Object-One-Story” system is a highly effective way to make steady progress without burnout. On the first of each month, choose a single heirloom from your collection. Dedicate a small amount of time each week to a specific task related to that object: research its origins in week one, find a related document in week two, interview a family member about it in week three, and write a summary paragraph in week four. At the end of the month, you will have one complete, well-researched story. Over a year, that’s twelve solid pieces of your family puzzle, accomplished without a single overwhelming weekend.
By delegating tasks and adopting a systematic, one-story-at-a-time approach, you can honor your ancestors and preserve their legacy without sacrificing your own well-being.
Frequently Asked Questions About How to Use Family Heirlooms to Unlock Your Genealogy?
What digital assets should be included in inheritance planning?
Include cloud storage access, genealogy site subscriptions, scanned photo collections, DNA test results, and any family history websites or blogs you’ve created.
How do I ensure digital files remain accessible after I’m gone?
Create a digital inventory document with all account information, use a password manager with emergency access features, and designate a digital executor who understands the technology.
Should I discuss the monetary value of heirlooms?
Focus first on emotional and historical value. Monetary discussions can come later if needed for insurance or estate planning purposes.